*Some settings are from the web
Step.Scoop
Install Scoop
There are already numerous articles online about the installation and configuration of Scoop, so I won’t elaborate further.
Install MPC-HC with Scoop
scoop bucket add extras
scoop install extras/mpc-hc-fork
Step.Settings
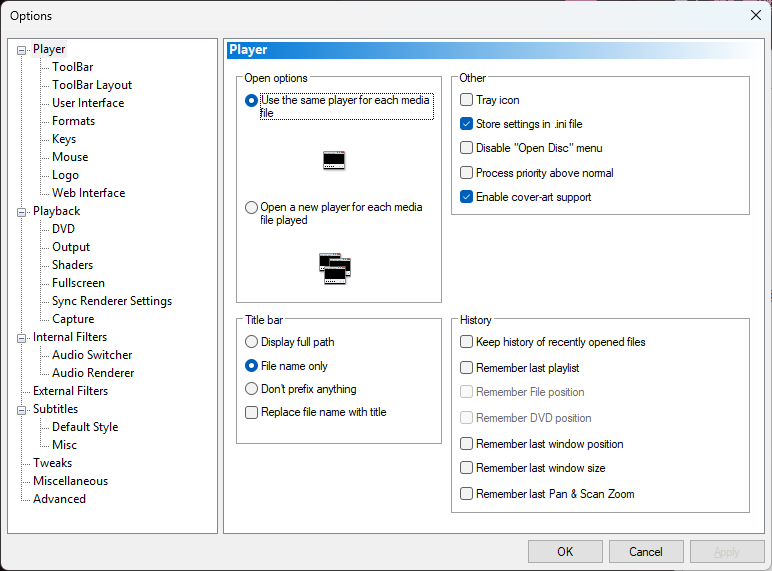
Go to Settings via View-Options.
Player Settings
Audio Settings
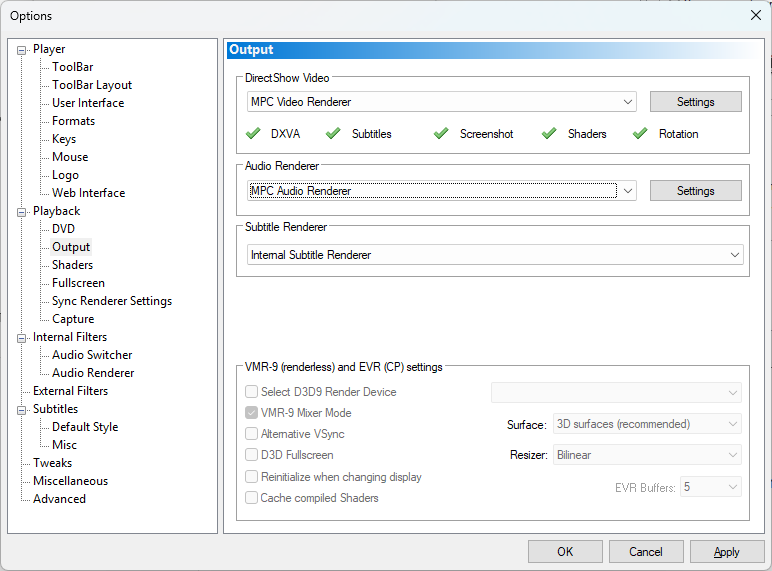
In Playback–Output, set DirectShow Video and Audio Renderer to MPC Audio Renderer.
In Internal Filters,Internal LAV Filters settings-Audio decoder,Mixing Options Page.
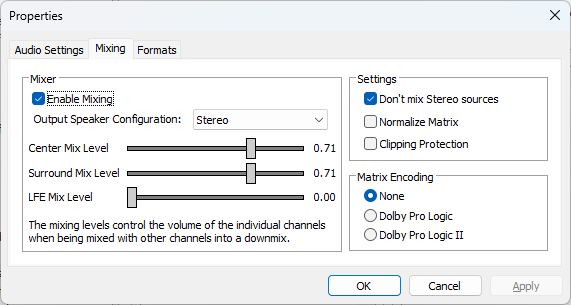
Mixer->Check Enable MixingMixer->Output Speaker Configuration-> <Change according to your device> (Stereo is Stereo)Settings->Don't mix Stereo sources(Users with stereo sources should check this)Settings->Clipping Protection(It is recommended to uncheck)
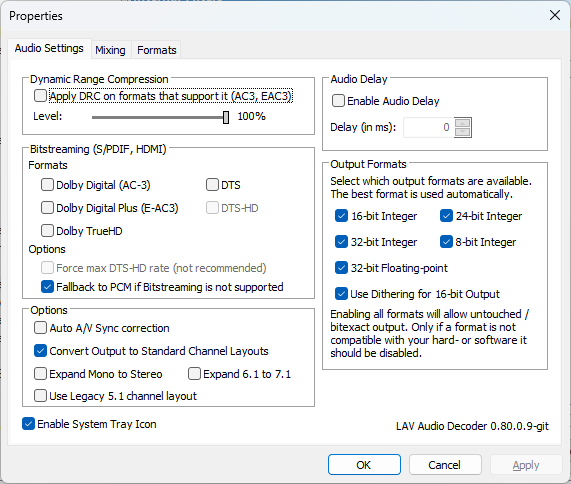
In Audio Settings(These options only need to be changed by users who have a dedicated sound card/external DAC and need to passthrough certain audio formats; general users do not need to make any changes.)
Video Settings
Internal Filters,Video decoder page
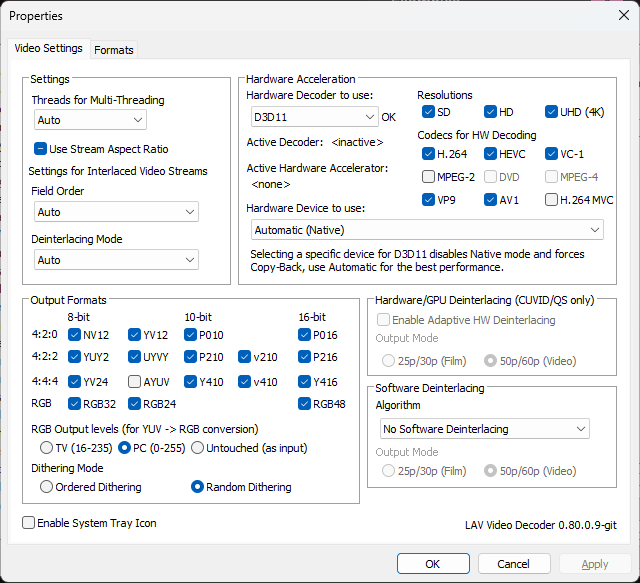
Hardware Acceleration->Hardware Decoder to use:- Use
D3D11and keep the defaultAutomatic (native)for Hardware Device to Use below - For Nvidia MX series graphics cards, as the video encoding/decoding units have been disabled, it is recommended to choose
D3D11and select your integrated graphics card in the Hardware Device to Use section below - It is not recommended to choose
DXVA2 (native)as it may cause quality loss in some cases
- Use
Output FormatsRGB Output levels-> SelectPC (0-255)Dithering Mode-> Dithering algorithm. For mostly watching movies,Ordered Ditheringis recommended. For mostly watching anime,Random Ditheringis recommended- In reality, for the usage scenarios in this tutorial (using MPCVR as the renderer), the output is almost always YUV data with the same bit depth as the source. Therefore, the options for RGB Output levels and Dithering Mode will not take effect in most cases.
Misc Settings
Memory File Playback Position—Player->Remember File positionAutomatically resize window after playback starts—Playback->Zoom & Alignment-> Auto Zoom (default is checked; recommended 100% [default])Auto-play the next video in the folder—Playback->After Playback(Suggest playing next file in the folder)Change maximum subtitle rendering resolution(to avoid blurry subtitles) —Subtitles->Texture Settings (…)->Maximum Texture Resolution(recommended to change to your screen’s resolution / 1920×1080 is also sufficient)
Step.MPC Video Renderer

- Check
Use Direct3D 11(checked by default on Windows 10/11) Texture format(processing precision) – Change to16-bit Floating Point8-bit Integeris not recommended
- Below Show Statistics, change Fixed font size to
Increase font by window- This option is for MPCVR statistics (can be brought up with Ctrl+j during playback). Changing this option is to prevent the issue of the statistics font being too small to read.
Wait for V-Blank before Present– Checking this may improve playback smoothnessDXVA2 and D3D11 video processor-> Use for: Uncheck all- DXVA2 and D3D11 video processor will override the settings in the Shader video processor section below. It offers the best performance, but the quality depends on the graphics card and may cause inaccurate colors due to driver issues. It is not recommended for use in non-special circumstances.
- Shader video processor section:
-
Chroma scaling–Catmull-Romis recommended;Bilinearcan be chosen if performance is poor.- The algorithm selected here is used to upscale the chroma of yuv420/422 video (generally not very perceptible).
Upscaling–Jinc2mis recommended.- The algorithm selected here is used to upscale the video frame (e.g., 720p -> 1080p).
Downscaling–Bicubic/Bicubic sharpis recommended; the latter is a bit sharper than the former.- The algorithm selected here is used to downscale the video frame (e.g., 2160p -> 1080p).
Use the "Upscaling" method to reduce the frame to 50%- This option means: when the target size is >= 50% of the source video, use the same algorithm as “Upscaling” to downscale the video.Whether to check this depends on personal preference.
-
Use dithering– It is highly recommended to check this.
-
- HDR section
I don’t have an HDR display available. Users with this need should make changes according to the official MPCVR documentation.Prefer Dolby Vision over PQ and HLG– Check this if you need to watch Dolby Vision content.Passthrough to display– If your display supports HDR, be sure to check this.Windows HDR– Select the method for switching to HDR mode, with default being no automatic switch.- If your display supports HDR, please change this option yourself.
If passthrough is impossible or disabled, then: ->Convert to SDR– If your display does not support HDR, check this.- This will convert HDR to SDR when HDR data cannot be passed through to the display or when “Passthrough to display” is unchecked.
END
Finally, don’t forget to click Apply(A) in the bottom right corner.